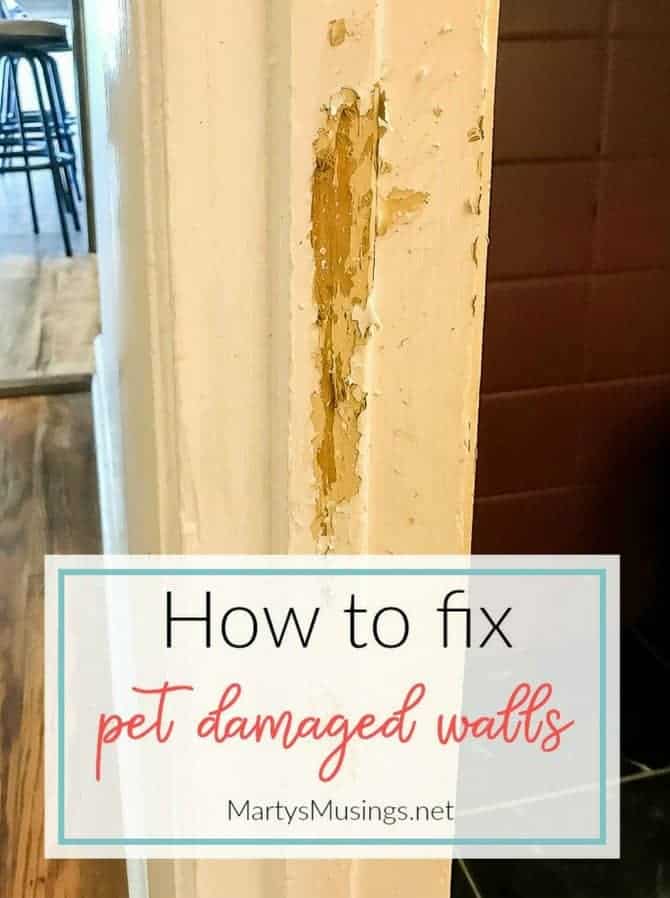
Have you noticed those annoying cat scratches ruining your walls? It can be frustrating to see your beautiful paint or wallpaper damaged by your furry friend’s sharp claws.
But don’t worry—you don’t have to live with those marks or spend a fortune on repairs. You’ll discover simple and effective ways to fix cat scratches on your walls quickly. By the end, you’ll have your walls looking smooth and fresh again, and you’ll even learn how to prevent future damage.
Keep reading—your walls will thank you!
Identify Scratch Damage
Identifying scratch damage is the first step to fixing cat scratches on walls. Knowing the extent of the damage helps choose the right repair method. Careful inspection saves time and effort later.
Assess Scratch Depth
Look closely at the scratches on your wall. Light scratches only affect the paint surface. Deep scratches go beyond paint into the wall material. Press your fingernail gently over the scratch. If it catches, the scratch is deep. Deep scratches need more repair work than light ones.
Check Wall Material
Walls have different materials like drywall, plaster, or wood. Each needs a different repair approach. Drywall scratches usually show white or gray under the paint. Plaster may crumble or flake around the scratch. Wood walls might have splinters or dents. Knowing your wall type helps pick the right fix. It also helps avoid more damage during repair.

Credit: www.reddit.com
Gather Repair Supplies
Fixing cat scratches on your wall starts with gathering the right supplies. Having everything ready makes the repair easier and faster. A few basic tools and some recommended products will help restore your wall’s look quickly.
Basic Tools Needed
First, collect simple tools for cleaning and smoothing the scratched area. You will need sandpaper to smooth rough edges. A putty knife helps spread repair compound evenly. A clean cloth is useful for wiping dust and dirt. Finally, a small paintbrush or roller will help you repaint the fixed spot.
Recommended Repair Products
Choose products made for wall repairs. Use spackling paste or wall filler to cover scratches. Pick a primer to prepare the surface for painting. Select paint that matches your wall color for best results. These products work well and are easy to find at any hardware store.
Prepare The Wall Surface
Preparing the wall surface is the first important step to fix cat scratches. A clean and smooth area helps the repair materials stick better. It also makes the final result look neat and even. Take your time to prepare the wall well before starting any patching or painting work.
Clean The Area
Remove dust and dirt from the scratched area. Use a damp cloth or sponge to wipe the wall gently. Avoid harsh chemicals that can damage the paint. Let the wall dry completely before moving on. Clean walls help the filler and paint stick properly.
Sand Rough Edges
Use fine sandpaper to smooth out rough edges around the scratches. Sand lightly to avoid making bigger holes. This step helps create an even surface for patching. After sanding, wipe away dust with a clean cloth. Smooth edges make repairs less noticeable.

Credit: www.williamsprofessionalpainting.com
Fill And Smooth Scratches
Filling and smoothing scratches on your wall makes the surface look new again. This step hides the marks left by your cat’s claws. It also helps the paint stick better. The process is simple and only takes a little time.
Apply Spackle Or Filler
Start by choosing a spackle or wall filler. Use a small putty knife to spread it over the scratches. Press the filler into the scratches to fill all gaps. Smooth out the surface as much as you can. Let the filler dry completely before moving on.
Sand For Even Finish
After the filler dries, take some fine sandpaper. Gently sand the repaired area in a circular motion. This removes bumps and rough edges. Sand until the surface feels smooth and flat. Clean off the dust with a dry cloth before painting.
Prime And Paint
Fixing cat scratches on walls often requires more than just filling holes. Priming and painting the area seals the repair and blends it with the rest of the wall. This step ensures the patch looks smooth and hides any damage clearly.
Priming creates a good base for paint to stick well. Painting last matches the wall’s color and finish. Together, these steps refresh your wall and keep it looking clean.
Choose Matching Paint
Pick paint that matches the wall’s color and finish. Use leftover paint if possible to get the exact shade. Check if the wall has a matte, satin, or glossy finish. Matching the finish helps the patch blend in better. Test the paint on a small spot first. Let it dry to see if it matches well.
Apply Primer And Paint
Start by applying a thin layer of primer to the repaired area. Primer blocks stains and helps paint cover evenly. Let the primer dry fully before painting. Next, use a small brush or roller to apply paint. Paint over the primed area in thin layers. Allow each layer to dry before adding another. This prevents drips and uneven texture. Repeat until the patch blends smoothly with the wall. Finally, clean your brushes and let the area dry completely.
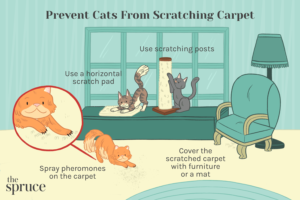
Prevent Future Scratches
Preventing future scratches on your walls is key to keeping your home damage-free. Cats scratch to mark territory and keep their claws sharp. Stopping this habit takes simple steps and patience. Protect your walls and teach your cat better habits for a peaceful home.
Use Protective Covers
Cover areas your cat scratches the most. Plastic guards or clear tape work well on walls. These covers block the cat’s claws from reaching the paint. They also protect your wall while being invisible. Change covers regularly to keep them sticky and effective. This method saves your walls without costly repairs.
Train Your Cat
Teach your cat where it can scratch. Provide scratching posts or pads nearby. Praise your cat when it uses these instead of the wall. Use toys or treats to guide your cat to the post. Avoid punishing; it confuses your pet. Consistency is key to changing your cat’s habit. Over time, your cat learns to scratch only allowed places.
Credit: www.martysmusings.net
Frequently Asked Questions
How Can I Quickly Fix Cat Scratches On Painted Walls?
Lightly sand the scratched area, apply matching paint, and let it dry for a smooth finish.
What Materials Do I Need To Repair Wall Scratches From Cats?
You need sandpaper, primer, matching paint, a small brush, and a clean cloth.
Can I Use Toothpaste To Hide Cat Scratches On Walls?
Toothpaste can fill minor scratches temporarily, but it’s best to repaint for lasting repair.
How Do I Prevent Cats From Scratching My Walls Again?
Use scratching posts, apply cat deterrent sprays, and trim your cat’s nails regularly.
Will Wall Repair Kits Work For Cat Scratches?
Yes, wall repair kits with putty and paint can effectively fix deeper scratches.
How Long Does It Take For Cat Scratch Repairs To Dry?
Paint and putty usually dry within 1-2 hours, but full curing may take a day.
Conclusion
Fixing cat scratches on walls takes patience and simple steps. Clean the area well to start. Use spackle or wall filler to cover scratches. Sand the patch smoothly once dry. Paint over with matching wall color for best results. Protect walls by trimming cat nails or using scratch guards.
Small repairs prevent bigger damage later. Keep your home looking neat and fresh. You can handle wall scratches easily with these tips.
As an Amazon Associate, I earn from qualifying purchases.