If you own horses, you know how important it is to keep their hay clean and waste-free. But buying a hay feeder can be expensive, and sometimes it doesn’t fit your stable just right.
What if you could build your own horse hay feeder, tailored exactly to your needs? You’ll discover simple, step-by-step tips to create a durable, cost-effective feeder that saves hay and keeps your horses happy. Ready to save money and make feeding time easier?
Let’s dive in and get started!
Choosing The Right Materials
Choosing the right materials for your horse hay feeder DIY project is key. The materials affect strength, safety, and how long the feeder lasts. Select materials that hold up to weather and horse use. Also, consider how easy it is to work with them. The right choice makes feeding easier and saves money in the long run.
Types Of Wood And Metal
Wood and metal are common choices for hay feeders. Wood is easy to find and shape. Cedar and pine resist weather well. Metal, like steel or aluminum, is very strong. It lasts longer but can be heavy. Wood feels softer for horses. Metal can handle rough use better.
Durability Considerations
Durability means the feeder stays safe and stable over time. Wood may rot or crack if wet. Treat wood to protect it. Metal resists weather but can rust. Use galvanized or painted metal to avoid rust. Check for sharp edges that could hurt horses. Strong joints help the feeder stay firm.
Budget-friendly Options
Building a feeder doesn’t have to cost much. Recycled wood or pallets work well. They save money and reduce waste. Scrap metal can be a good choice too. Avoid expensive hardwoods or metals if you want to save. Simple designs use fewer materials and cost less. Focus on safety and strength first.
Credit: www.haybossfeeders.com
Essential Tools For The Project
Building a horse hay feeder yourself saves money and lets you customize it. Having the right tools makes the project easier and safer. This section covers the essential tools you need for a DIY hay feeder.
Basic Carpentry Tools
Start with a tape measure to get accurate sizes. Use a handsaw or circular saw to cut wood pieces. A hammer helps to drive nails securely into wood. Screwdrivers, both flathead and Phillips, tighten screws. A carpenter’s square ensures your cuts and joints are straight. Sandpaper smooths rough edges for safety and neatness.
Safety Equipment
Wear safety glasses to protect your eyes from dust and wood chips. Use gloves to guard your hands against splinters and sharp tools. Ear protection is important if you use loud power tools. A dust mask keeps you safe from inhaling sawdust. Proper footwear prevents injuries from dropped tools or wood.
Optional Power Tools
A power drill speeds up screwing and drilling holes. A jigsaw allows for curved or intricate cuts. An electric sander smooths wood faster than sanding by hand. A nail gun can save time on larger projects. These tools are helpful but not necessary for beginners.
Planning Your Hay Feeder Design
Building your own horse hay feeder starts with careful planning. A good plan saves time and materials. It also helps create a feeder that suits your horse’s needs perfectly.
Think about the size of your horses and how much hay they eat. Also, consider the space where you will place the feeder. Plan for features that keep the hay clean and dry.
Size And Capacity Needs
Choose a size that fits your horse’s daily hay intake. Bigger horses need more hay at once. For multiple horses, plan a larger feeder or multiple feeders.
Make sure the feeder holds enough hay to last between refills. Avoid feeders that are too small or too large. A good size helps reduce waste and saves money.
Designs To Prevent Waste
Hay waste costs money and creates mess. Design your feeder to limit hay dropping on the ground. Use slats or bars to hold the hay securely.
Keep the feeder at a height that stops horses from pulling out too much hay. A well-designed feeder keeps hay clean and fresh longer.
Weather-resistant Features
Protect hay from rain and snow with a covered feeder. Use waterproof materials or add a roof. This keeps the hay dry and prevents mold.
Choose materials that resist rust and decay. Wood should be treated or sealed. Metal parts should be coated to last outdoors.

Credit: neslihandolar.com
Step-by-step Building Process
Building a horse hay feeder yourself saves money and ensures it fits your needs. The process is simple if you follow clear steps. This guide breaks down each part of the build. You will see how to prepare materials, assemble the frame, add feeding bars, and finish the feeder for long use.
Cutting And Preparing Materials
Start by selecting strong wood or metal for the feeder. Measure and mark all parts carefully. Cut the pieces to the right size using a saw. Smooth rough edges with sandpaper to prevent splinters. Check that all parts are clean and ready for assembly.
Assembling The Frame
Lay out the cut pieces on a flat surface. Join the sides and bottom parts to build the frame. Use screws or nails to secure the joints firmly. Make sure the frame is square and stable. Tighten all fasteners to avoid loose parts.
Adding Feeding Bars And Supports
Attach feeding bars evenly across the top of the frame. These bars keep the hay in place and allow easy access for horses. Add supports below the bars for extra strength. Use strong screws to hold bars and supports tightly. Check spacing to fit your horses comfortably.
Finishing Touches And Protection
Sand all surfaces to make the feeder smooth and safe. Apply a weather-resistant sealant or paint to protect against rain. Let the finish dry completely before use. Place the feeder in a dry, level area for best results. Regular maintenance will extend its life and keep horses happy.
Maintenance Tips For Longevity
Maintaining your DIY horse hay feeder helps it last longer and work better. Proper care keeps the feeder safe for your horses. It also saves money by avoiding early repairs or replacements. Follow these simple tips to keep your feeder in good shape.
Regular Cleaning
Clean the feeder often to remove dust, dirt, and old hay. Use a brush or cloth to clear out debris. Wash with mild soap and water to prevent mold. Let the feeder dry completely before refilling. Clean feeders stop bacteria and keep hay fresh.
Inspecting For Damage
Check the feeder regularly for cracks, loose parts, or sharp edges. Tighten screws and fix broken pieces fast. Damaged feeders can hurt horses or waste hay. Early repairs keep the feeder strong and safe.
Seasonal Care
Adjust your care depending on the season. In winter, protect the feeder from snow and ice. In summer, watch for sun damage or cracking wood. Cover or move the feeder if needed. Seasonal care prevents weather damage and extends feeder life.
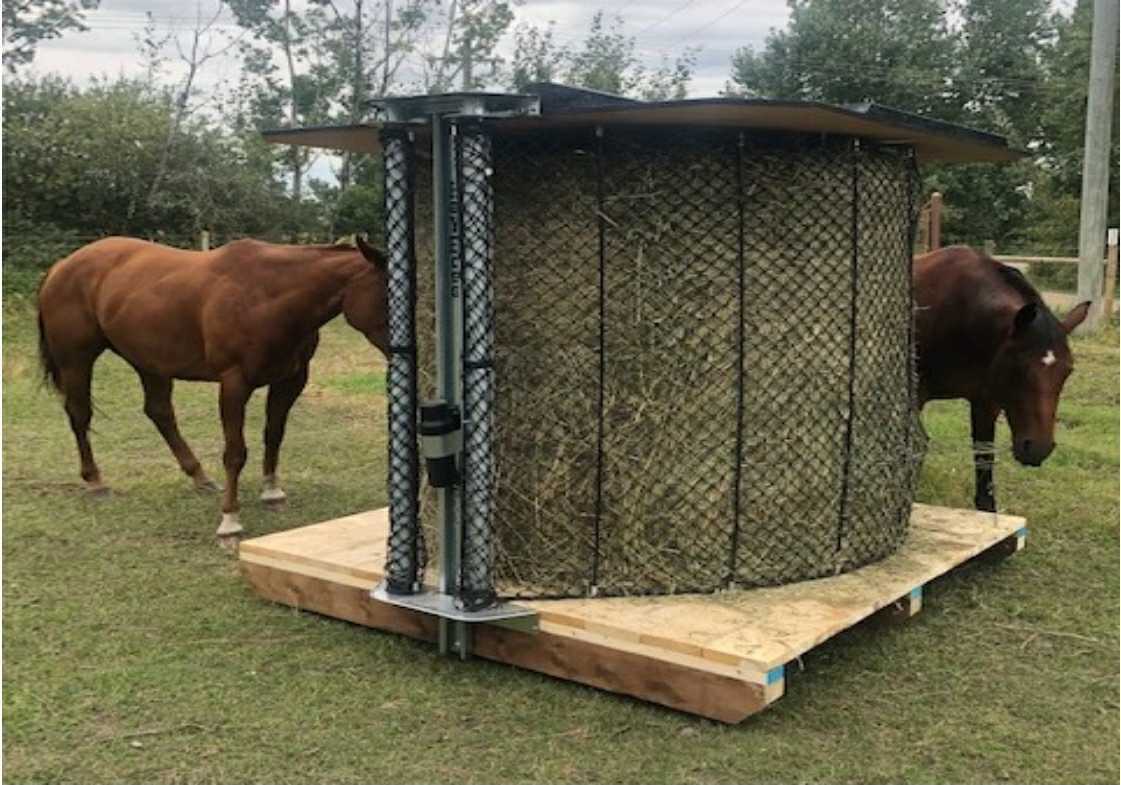
Credit: diynets.net
Cost-saving Tips And Alternatives
Building a horse hay feeder yourself saves a lot of money. Choosing the right materials and design helps reduce costs. There are easy ways to keep your project budget-friendly without losing quality.
Using Recycled Materials
Old pallets, scrap wood, and leftover metal work well for feeders. These materials are often free or very cheap. They help lower your overall project expenses. Plus, reusing materials is good for the environment.
Check around your farm or local businesses for discarded materials. Make sure the wood is safe and not treated with harmful chemicals. Clean and prepare all recycled parts before use.
Simple Vs. Complex Designs
Simple feeders need fewer tools and less time to build. They use less material, which cuts costs. Complex designs may look nicer but cost more. Stick to basic shapes and strong structures for savings.
Simple feeders also require less maintenance. This saves money in the long run. Focus on durability and easy access for your horse.
Where To Find Affordable Supplies
Local hardware stores often have sales or discounts on building materials. Check farm supply shops for hay feeder parts. Online marketplaces offer secondhand items at lower prices.
Community groups and social media pages can connect you with cheap or free supplies. Compare prices and quality before buying. Buying in bulk can also reduce cost.
Frequently Asked Questions
What Materials Are Needed For A Diy Horse Hay Feeder?
Wood, screws, nails, a saw, and sandpaper are basic materials for a simple feeder.
How Do I Build A Safe Horse Hay Feeder?
Use smooth wood edges and secure all parts tightly to avoid injuries.
What Size Should A Horse Hay Feeder Be?
Make it large enough to hold enough hay and allow easy access for your horse.
Can I Build A Weatherproof Horse Hay Feeder?
Yes, treat the wood with outdoor sealant or paint for weather resistance.
How Do I Prevent Hay Waste With A Diy Feeder?
Design with slats or grids to reduce hay dropping and keep it clean.
How Much Does It Cost To Make A Horse Hay Feeder?
Costs vary, but basic feeders often cost under $50 in materials.
Conclusion
Building a horse hay feeder yourself saves money and fits your space. It keeps hay clean and reduces waste. You can choose the size and style that works best. Using simple tools and materials makes the project easy. Your horse will enjoy fresh hay every day.
A DIY feeder is a smart choice for any horse owner. Try making one to see the benefits yourself. Simple, useful, and satisfying to build.
As an Amazon Associate, I earn from qualifying purchases.