Are you ready to turn heads with a fun and creative costume? Making a cat tail costume is easier than you think, and it’s a perfect way to add a playful touch to your outfit.
Whether you’re dressing up for a party, Halloween, or just want to surprise your friends, this guide will show you how to create a cat tail that feels comfortable and looks amazing. Keep reading, and by the end, you’ll have all the tips you need to make a tail that’s both stylish and easy to wear.
Let’s get started!

Credit: www.youtube.com
Materials Needed
Gathering the right materials is the first step to creating a cat tail costume. The materials affect how your tail looks and feels. Choose items that are easy to work with and comfortable to wear. Prepare your workspace with tools and accessories for a smooth crafting process.
Fabric Choices
Select soft, flexible fabric for the tail. Felt and fleece work well because they hold shape and are easy to sew. Faux fur adds a realistic touch and a fluffy texture. Pick colors that match your costume or your favorite cat style. Lightweight fabric helps keep the tail comfortable all day.
Essential Tools
Basic sewing supplies make construction easier. Needles and thread in matching colors are key. Fabric scissors cut clean edges without fraying. Pins hold fabric pieces together before sewing. A measuring tape ensures the tail fits your size. Hot glue can speed up assembly for some parts.
Optional Accessories
Extras can give your tail a special look. Wire inside the tail lets you shape it and keep curves. A belt loop or clip helps attach the tail securely. Decorative items like ribbons or bells add fun details. Stuffing materials like cotton or polyester fill the tail to make it plump.
Measuring And Planning
Measuring and planning are the first steps in making a cat tail costume. This stage helps you create a tail that fits well and looks great. Taking time here saves effort later.
Determining Tail Length
Start by deciding how long the tail should be. Measure from the base of your lower back downwards. Typical cat tails range from 18 to 30 inches. Choose a length that feels comfortable and suits your costume style.
Remember, a tail too long can be hard to carry. A very short tail might look less realistic. Find a balance that fits your needs.
Selecting Tail Shape
Cat tails come in many shapes. Some are straight, others have a curve or a fluffy end. Think about the cat breed you want to imitate or the style you like.
Choose a shape that matches your costume and movement. A simple straight tail is easier to make. A curved or bushy tail looks more natural but needs extra work.
Sketching Your Design
Draw your tail on paper before starting. Sketch the length and shape you chose. Add details like fur texture or stripes.
This helps you see the final look. It also guides you in cutting fabric and adding support. A clear plan makes crafting easier and faster.
Cutting The Fabric
Cutting the fabric is a key step in making a cat tail costume. It shapes the tail and makes sure it fits well. Careful cutting helps the tail look neat and last longer. This part needs focus and simple tools.
Creating A Template
Start by drawing the tail shape on paper. Make it long and slightly curved for a natural look. The template helps cut the fabric evenly. Use scissors to cut out the paper shape. Pin the paper template onto the fabric carefully.
Cutting Accurate Pieces
Use sharp fabric scissors for clean edges. Cut slowly along the template lines on the fabric. Cut two pieces: one for the front and one for the back. Keep the fabric flat and smooth while cutting. Accurate pieces make sewing easier and the tail look better.

Credit: www.doityourselfdivas.com
Sewing The Tail
Sewing the tail is the key step in making your cat tail costume. It shapes the tail and gives it a neat look. Take your fabric pieces and prepare to join them carefully. Use simple stitches to keep everything strong and tidy.
Stitching Edges
Start by aligning the fabric pieces with the right sides facing each other. Pin the edges to keep them in place. Sew along the edges using a straight stitch. Keep your stitches close and even. This will prevent the stuffing from coming out. Leave the seam allowance about half an inch for a clean finish.
Leaving An Opening For Filling
Do not sew the entire edge shut. Leave a small opening, about three to four inches long. This space will allow you to add stuffing inside. Make sure the opening is easy to reach but not too big. After stuffing, you will sew this gap closed by hand for a smooth look.
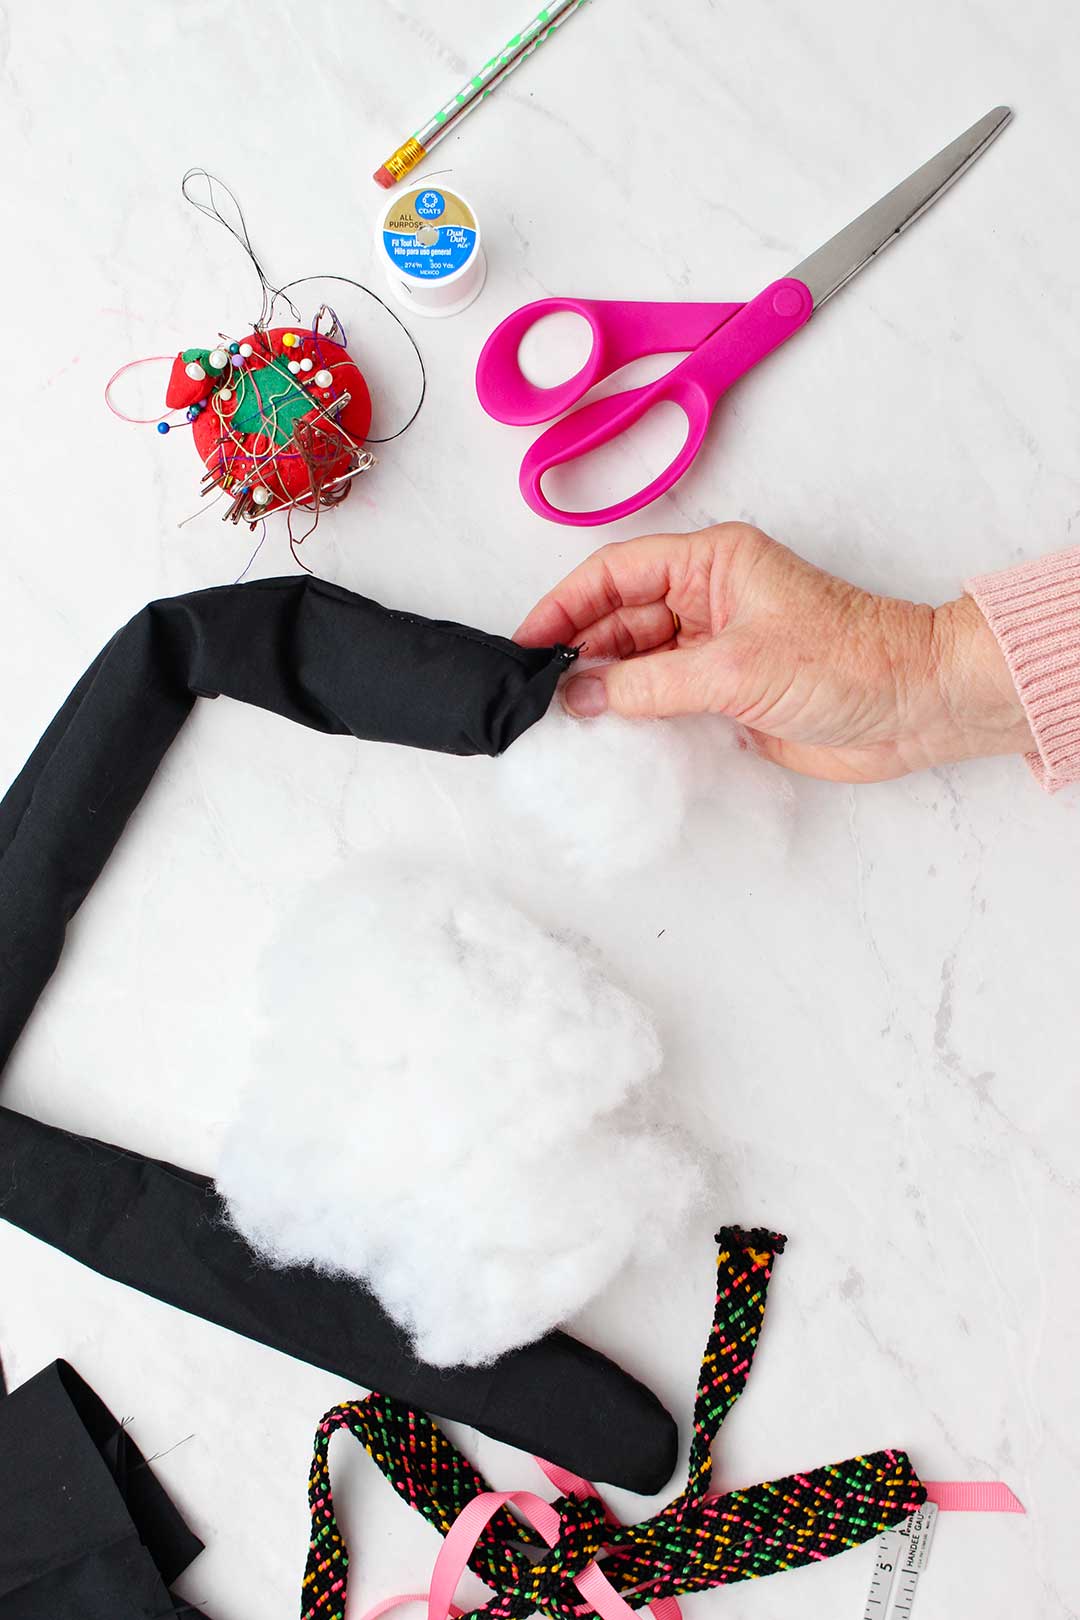
Adding Filling
Adding filling to your cat tail costume gives it shape and makes it look real. The right filling helps the tail stay soft and flexible. Filling also affects how the tail moves and feels. Follow simple steps to get the best results for your costume.
Choosing The Right Stuffing
Pick stuffing that is light and soft. Polyester fiberfill is a good choice. It is easy to find and holds shape well. Foam strips can add firmness but may be heavy. Avoid heavy materials that make the tail droop. Cotton balls are soft but can clump inside the tail.
Evenly Distributing Fill
Fill the tail slowly and gently. Push the stuffing evenly from the base to the tip. Use your fingers or a pencil to spread filling inside. Avoid lumps or empty spots. Check the tail shape often while filling. Balanced filling keeps the tail looking natural and smooth.
Credit: welcometonanas.com
Attaching The Tail
Attaching the tail is a key step in making your cat tail costume complete. The right method keeps the tail secure and comfortable. It also helps the tail move naturally as you walk or play. Choose a way that fits your materials and skills best.
Using A Belt Loop
Find a sturdy belt or waistband to hold your tail. Thread the tail’s base through the belt loop. Make sure the tail hangs down straight. This method works well for tails with a loop or strap at the top. It keeps the tail stable and easy to remove.
Sewing On A Safety Pin
Attach a large safety pin to the tail’s top. Pin it to your clothes at the back. Use strong fabric that can hold the weight. This method is quick and simple. It also lets you remove the tail easily when needed.
Adding Velcro Straps
Sew or glue Velcro strips to the tail base. Attach the matching strips to your clothing or belt. Press the strips together to secure the tail. Velcro lets you adjust the tightness. It is very comfortable and keeps the tail in place.
Finishing Touches
The finishing touches make your cat tail costume look complete and realistic. This part adds personality and detail. It helps the tail match the rest of your outfit perfectly.
Small changes can make a big difference. Choose details that fit your cat character. Soft fur or bold stripes can change the tail’s style. Paint or dye can add color and depth. This step brings your creation to life.
Adding Fur Or Texture
Use faux fur fabric to cover your tail. It feels soft and looks like real cat fur. Cut the fur to fit the tail shape. Glue or sew it carefully to avoid gaps. Brush the fur to make it smooth and neat.
Texture creates a natural look. You can use different fur lengths for stripes or spots. Felt or velvet also works for smooth tails. Mix materials to add interest and realism. Textured tails catch the eye and feel more fun.
Painting Or Dyeing Details
Use fabric paint to add stripes or spots. Choose colors that match your cat’s style. Paint thin lines for whisker marks or shadows. Let the paint dry fully before handling the tail.
Dye can change the base color of the tail. Use it on fabric or faux fur carefully. Test dye on a small piece first. This step makes your tail unique and colorful. It adds depth and brings out details.
Tips For Comfort And Durability
Making a cat tail costume is fun, but comfort and durability matter most. You want the tail to stay in place and feel good to wear. This section shares simple tips to keep your tail comfy and strong.
Securing The Tail Properly
Attach the tail firmly to your outfit or belt. Use a strong clip or sew it on tight. Avoid loose attachments that can fall off or swing too much. Check the tail often while wearing it. Adjust if it feels loose or uncomfortable.
Choosing Lightweight Materials
Pick light fabrics like felt or soft fleece for the tail. Heavy materials can pull and cause discomfort. Lightweight stuffing helps the tail keep shape without extra weight. This makes moving easy and keeps the tail looking good all day.
Frequently Asked Questions
What Materials Do I Need To Make A Cat Tail Costume?
You need fabric, stuffing, a needle, thread, scissors, and a belt or elastic band.
How Long Should The Cat Tail Be?
A tail length of 18 to 24 inches works well for most costumes.
Can I Make A Cat Tail Costume Without Sewing?
Yes, use fabric glue or safety pins to attach the tail if you don’t sew.
How Do I Attach The Cat Tail To My Clothes?
Use a belt, elastic band, or safety pins to secure the tail to your waist.
What Fabric Is Best For A Soft Cat Tail?
Fleece, faux fur, or felt are soft and easy to shape for the tail.
How Do I Add A Realistic Look To My Cat Tail?
Shape the tail with stuffing and add stripes or spots using fabric paint or markers.
Conclusion
Creating a cat tail costume is fun and simple. You only need a few materials and some patience. Follow each step carefully to get the best result. Personalize your tail with colors or patterns you like. Wear your costume with pride at any event or party.
Making your own costume saves money and feels rewarding. Try this project to enjoy a creative and playful experience. Your cat tail will be a great addition to your outfit. Enjoy dressing up and showing off your unique style!
As an Amazon Associate, I earn from qualifying purchases.