Are you tired of opening the door every time your dog wants to go outside? Installing a dog door in your glass door can give your furry friend the freedom they deserve.
But how do you do it without breaking the glass or making a costly mistake? In this guide, you’ll learn simple, step-by-step tips to put a dog door in your glass safely and effectively. By the end, you’ll have the confidence to create easy access for your pet—and enjoy the convenience yourself.
Keep reading to find out how!
Credit: www.petdoors.com
Choosing The Right Dog Door
Choosing the right dog door for your glass door is important. It ensures your pet moves freely and stays safe. The right door fits well, looks good, and works smoothly with your glass. This section helps you find the best dog door for glass doors.
Types Suitable For Glass Doors
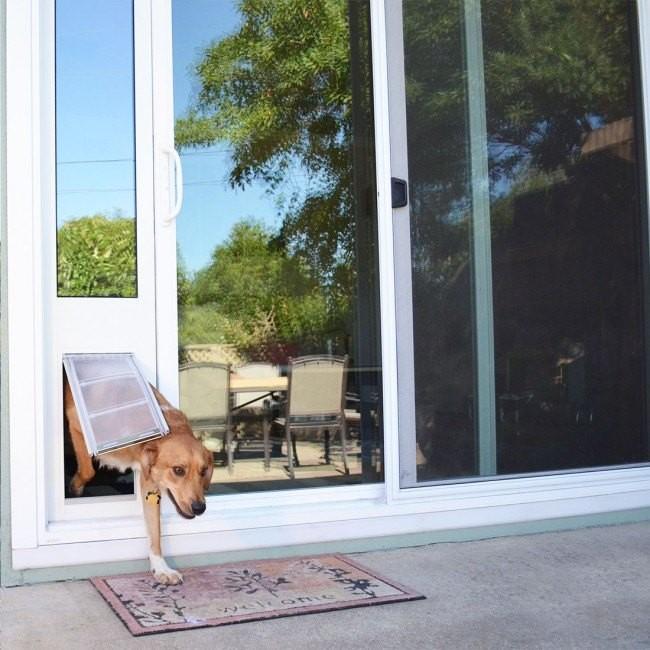
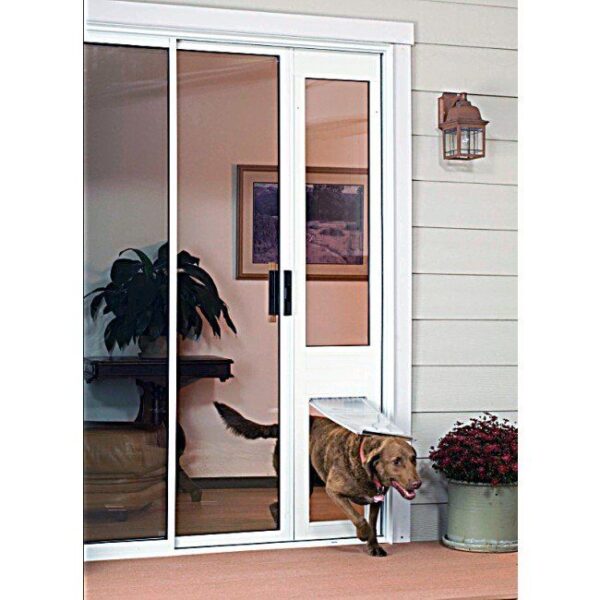
Not all dog doors fit glass doors. Sliding glass doors need special models. These doors attach without cutting the glass. Some dog doors fit inside the door frame. Others stick on the glass with strong adhesive.
Look for doors made for glass. They have clear panels or frames that match glass surfaces. These keep your door strong and your pet safe. Choose between magnetic flaps or flexible ones. Both work well on glass doors.
Measuring Your Dog
Measure your dog before buying a door. Measure your dog’s height from the ground to the shoulders. Also, measure the width across the widest part of your dog’s body. This helps pick a door your dog can easily use.
Check your dog’s weight too. Some dog doors have weight limits. Measure your dog standing naturally. Avoid measuring when your dog is sitting or lying down. Accurate size means less trouble for your pet.
Selecting The Best Size
Pick a door slightly bigger than your dog’s size. The door should be at least two inches taller than your dog’s height. The width should be wide enough for easy movement. Too small doors can hurt or stress your dog.
Consider the flap size. It should open easily without being too loose. A well-sized door keeps your home insulated. It stops cold air or bugs from coming inside. Size matters for comfort and safety.
Gathering Tools And Materials
Before installing a dog door in glass, gather all necessary tools and materials. Proper preparation makes the job easier and safer. Having everything ready saves time and avoids interruptions. This section lists the essential tools and safety gear needed for the project.
Essential Tools Needed
Start with a drill that can handle glass drilling. Use diamond-tipped drill bits for clean cuts. A glass cutter helps score the glass before drilling. Measuring tape ensures accurate placement of the dog door. A suction cup glass lifter can hold the glass steady. Silicone sealant is useful for waterproofing the edges. A pencil or marker helps mark the cutting area clearly. Have a cloth nearby to clean dust and debris.
Safety Gear To Use
Wear safety goggles to protect eyes from glass shards. Use gloves to shield hands from sharp edges. A dust mask prevents inhaling glass particles. Wear long sleeves to protect arms from cuts. Ensure shoes fully cover your feet for extra safety. Use ear protection if the drill is loud. Keep a first aid kit nearby for emergencies.
Preparing The Glass Door
Preparing the glass door is a key step before installing a dog door. This ensures a clean, precise fit that works well. Careful preparation protects the glass and makes installation easier.
Taking time here saves headaches later. Follow clear steps to get the glass ready for the dog door.
Cleaning And Marking The Spot
Start by cleaning the glass surface thoroughly. Use a glass cleaner and a soft cloth. Remove all dirt, dust, and grease. A clean surface helps you mark accurately and prevents slipping tools.
Next, decide where to place the dog door. Choose a spot at your dog’s comfortable height. Use a marker to outline the area. Measure twice to avoid mistakes. Clear, visible marks guide your cutting or drilling.
Checking Door Thickness
Measure the glass thickness with a ruler or caliper. Most dog doors fit standard glass thicknesses. Confirm that your dog door matches your glass size.
Too thick or too thin glass may not work with the dog door. Knowing the thickness helps you buy the right model. It also ensures a secure and safe installation.
Cutting The Glass Safely
Cutting glass for a dog door requires care and safety. Glass can break suddenly and cause injury. Following safe steps helps protect you and your home. Use the right tools and techniques for a clean cut. Protect your hands, eyes, and work area. Take your time and work carefully.
Scoring Techniques
Use a glass cutter with a sharp wheel. Hold it firmly and score the glass once. Score along the marked line without pressing too hard. Keep a steady hand and follow the guide. Avoid scoring back and forth; one clean line is best.
Breaking The Glass Cleanly
After scoring, place the glass on a flat surface. Align the score line with the edge of the table. Apply gentle pressure on both sides of the line. The glass will snap along the score. Use pliers to break small pieces carefully.
Handling Glass Fragments
Wear thick gloves to handle broken glass. Use a brush and dustpan to collect fragments. Dispose of glass safely in a sturdy container. Clean the work area thoroughly to remove tiny shards. Keep children and pets away during cleanup.
Installing The Dog Door Frame
Installing the dog door frame is a key step in fitting a dog door in glass. The frame holds the door securely and provides a neat finish. Proper installation ensures the door works smoothly and stays in place for a long time.
This section guides you through aligning the frame perfectly. It also explains how to secure the frame using adhesives or screws for a strong hold.
Aligning The Frame
Place the dog door frame over the cut glass area. Check that the frame fits snugly without gaps. Align it so the door flap swings freely. Make small adjustments to keep the frame level and centered. A well-aligned frame prevents air leaks and keeps the door stable.
Securing With Adhesives Or Screws
Use the adhesive provided with the door kit or a strong glass-safe glue. Apply the adhesive evenly on the frame edges. Press the frame firmly against the glass. Hold it in place until the adhesive sets. Alternatively, use screws if the frame and glass allow it. Pre-drill holes carefully to avoid cracks. Tighten screws gently to avoid damage. Secure fastening keeps the dog door durable and safe.
Sealing And Finishing Touches
Sealing and finishing touches are key steps after installing a dog door in glass. These steps stop air and water from entering your home. They also make the door look neat and work smoothly. Taking time on these details helps your dog door last longer and keeps your house comfortable.
Weatherproofing The Edges
Start by checking all edges around the dog door frame. Use a good quality silicone sealant made for glass. Apply the sealant evenly to close any gaps between the door frame and glass. This prevents rain, wind, and dust from coming inside.
Let the sealant dry fully before touching the door. Avoid thick layers to keep a clean look. Weatherproofing protects your home from drafts and keeps your energy bills low.
Testing Door Movement
Open and close the dog door several times after sealing. Make sure the flap moves freely without sticking. The door should close fully to keep cold air out. Watch for any parts that rub or catch on the frame.
If needed, adjust the door or tighten screws. Smooth movement means your dog can use the door easily. Testing now saves problems later and keeps your pet happy.
Maintenance Tips
Maintaining a dog door installed in glass ensures it lasts longer and works well. Regular care keeps the door clean and secure. Simple steps help avoid damage and keep your pet safe.
Cleaning The Dog Door
Clean the dog door often to remove dirt and dust. Use a soft cloth and mild soap with water. Avoid harsh chemicals that can harm the glass or door. Wipe both sides of the door gently. Dry it with a clean towel to stop water spots. Clean the flap to keep it flexible and easy to open.
Inspecting For Wear And Tear
Check the dog door for cracks or loose parts every month. Look at the flap and frame for damage. Tighten screws if they feel loose. Replace worn-out parts to keep the door safe. Early repairs stop bigger problems later. Keep the door working smoothly for your dog’s comfort.
Credit: www.khasakh.com

Credit: www.youtube.com
Frequently Asked Questions
What Tools Do I Need To Install A Dog Door In Glass?
You need a drill, glass cutter, measuring tape, sealant, and the dog door kit.
Can I Install A Dog Door On Tempered Glass?
No, cutting tempered glass is risky and can cause it to shatter.
How Do I Measure The Glass For The Dog Door?
Measure your dog’s height and width, then mark the glass accordingly.
Is It Safe To Cut A Hole In Glass For A Dog Door?
Yes, with the right tools and care, cutting glass can be done safely.
What Sealant Should I Use Around The Dog Door In Glass?
Use clear silicone sealant to prevent water and air leaks around the door.
Can I Install A Dog Door In Double-pane Glass Windows?
It’s difficult; removing one pane or replacing the window may be necessary.
Conclusion
Installing a dog door in glass takes care and the right tools. Follow steps slowly and double-check measurements. Choose a door that fits your dog’s size well. Always wear safety gear to protect yourself. Keep the glass clean before and after cutting.
Your pet will enjoy easy outdoor access. This project can save trips to open doors. Enjoy the convenience and freedom for your dog. Simple steps lead to a happy pet and home.
As an Amazon Associate, I earn from qualifying purchases.